Loop Fixer
Eliminate the "pop" at the loop seam. Two modes, live preview, no manual keyframes required.
Tier: Builder Pro Menu:
Polish → Loop FixerShortcut:Ctrl + Shift + L
What it does
Looping animations cycle from frame N (the last frame) back to frame 0 (the first frame) instantly. If the pose at frame N differs from the pose at frame 0, the playback shows a visible discontinuity — the dreaded "pop" — every time the loop wraps. Loop Fixer pulls the tail of the animation toward frame 0's pose so the cycle reads as seamless.
Two correction strategies:
- Snap mode: replace (or insert) a keyframe at exactly
t = durationwith frame 0's value. Hard cut, perfect mathematical loop, may show a one-frame jump just before the seam if the original tail diverged sharply. - Blend mode: smoothstep ramp the last
Nkeyframes toward frame 0's value. The closer to the seam, the more the bone is pulled toward frame 0. Soft, gradual, no visible jump.
Both modes operate on clipData tracks — the result survives playback, retarget, and export.
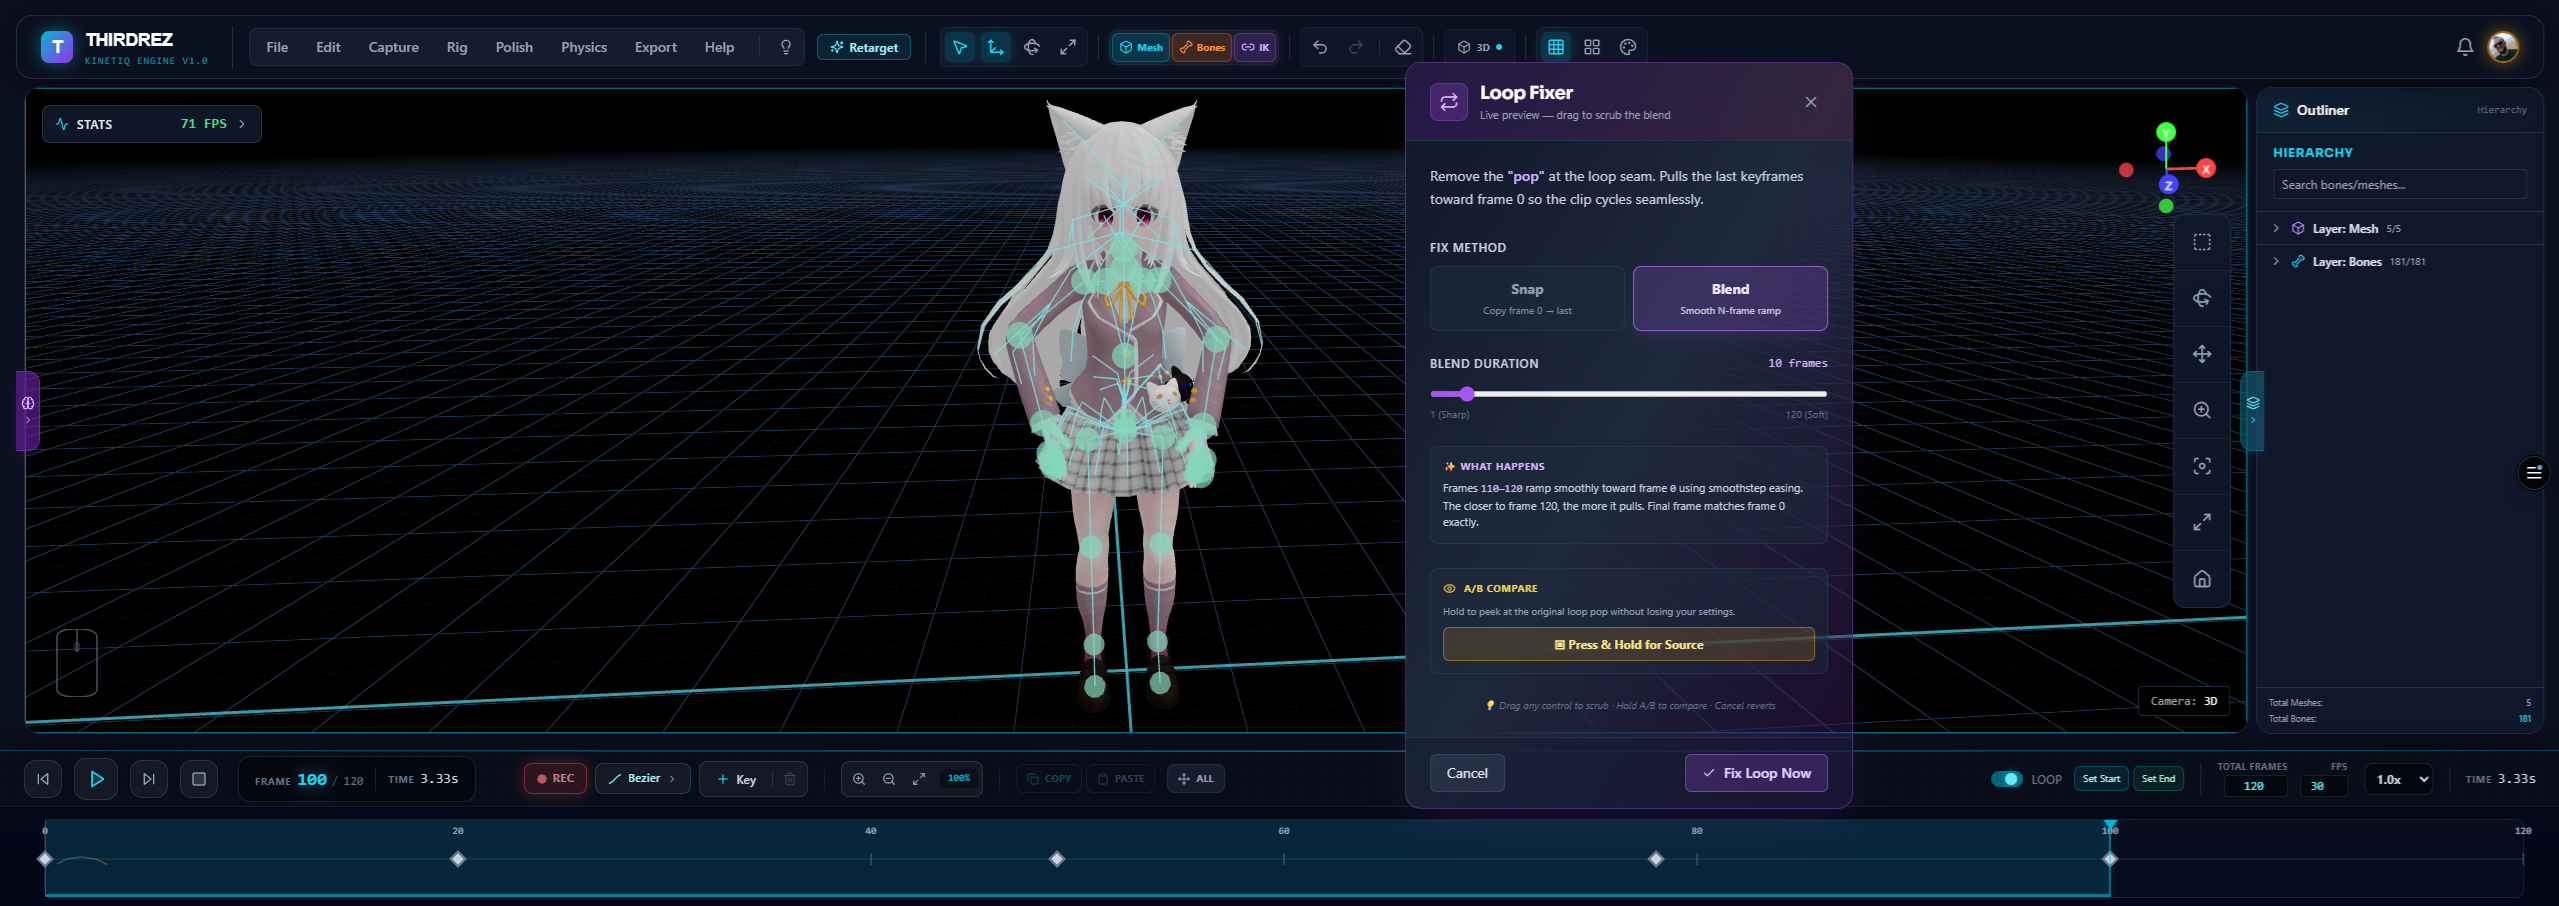
The Loop Fixer modal. Pick Snap for a hard mathematical loop or Blend for a smoothstep ramp; drag the blend duration slider and watch the seam tighten in real time. The preview is live — Cancel restores the original, and Ctrl+Z after Apply is your before/after.
Snap vs. Blend — when to use which
Use Snap when:
- The clip is short (under 1 second) and a one-frame jump won't be perceptible.
- You're testing the concept of a loop and need a quick perfect closure to validate.
- Frame
N's pose is already very close to frame0's pose (a hard cut just refines what's almost there).
Use Blend when:
- The clip is longer than ~1 second.
- Frame
Nand frame0are visibly different (e.g., walk cycle that wasn't authored as a loop). - You want the loop to read as natural rather than mathematically perfect.
In practice, Blend is the right answer for ~95% of clips. Snap exists for the edge cases.
Blend duration scrubbing
When in Blend mode, the Blend Duration slider controls how many tail frames participate in the ramp.
Blend Duration: 10 frames
[●━━━━━━━━━━━━━━━━━━]
1 (Sharp)              30 (Soft)
- Sharp (1-3 frames): the ramp finishes quickly. Most of the original tail survives, only the last few frames blend. Useful for fast / punchy animations where a long blend would visibly slow the motion.
- Soft (15-30 frames): the ramp is gentle and gradual. The last half-second-ish of the clip blends. Useful for slow / cinematic motion where any abrupt change is jarring.
The slider's max range is the clip's total frame count, so a 60-frame clip lets you blend up to 60 frames (i.e., the entire clip). A 20-frame clip caps at 20.
The viewport updates live as you drag — no preview button, no commit. Find the visual sweet spot, then click Apply.
Sample on demand — no keyframes required
The previous Loop Fixer (v1) hard-required explicit keyframes at frame 0 and frame N - 1 to function. After any retarget operation, those keyframes were silently dropped, and the feature became unusable until the user manually re-authored them. This was the wall many users hit when they tried "Select All" looking for a way out.
V2 removes that requirement. The fix operates on TrzClipData tracks directly — and clipData tracks are continuous (the mixer interpolates between keyframes for any time). So Loop Fixer can:
- Read frame 0's value by sampling the first keyframe of each track (no explicit keyframe at
t = 0needed; the mixer extrapolates the first value backward). - Write the closure value at exactly
t = durationby appending a new keyframe if none exists, or replacing the existing one.
The amber warning "Requires keyframes at frame 0 and frame N" that defined v1 is gone. Just open the modal and apply.
Live preview — see it before you commit
The modal carries the same live-preview pattern as Mirror Animation:
- Snapshot on open: when you launch the modal, the current
clipDatais deep-cloned into memory. - Live update on every control change: switch modes, drag the slider — the viewport repaints with the corrected loop, RAF-debounced for smoothness.
- Apply commits: the latest preview is promoted to the canonical
clipData. Undo-able withCtrl+Z. - Cancel restores: Cancel or ✕ re-installs the snapshot. The viewport returns to the exact state it had before you opened the modal.
(v1.1 note: the old "Press & Hold" A/B button was retired — live preview + Cancel/Ctrl+Z are the professional before/after.)
Workflow — typical session
- Play your animation with Loop enabled in the timeline. Watch for the seam.
- Spot a visible pop at the wrap point.
Polish → Loop Fixer(orCtrl + Shift + L).- Modal opens. Default mode is Blend, default duration is
10 frames. - Watch the viewport — the seam should be visibly smoother already.
- (Optional) Drag the slider toward Soft until the loop reads as completely seamless.
- Apply to commit (
Ctrl+Zany time to compare against the original). - Re-watch playback. The pop should be gone.
Math — smoothstep blending
For each existing keyframe whose time t falls inside the blend window [duration - blendFrames/fps, duration]:
alpha = (t - blendStart) / blendDuration       // 0..1, normalized progress through the window
sa    = alpha² × (3 - 2·alpha)                 // smoothstep easing — zero derivatives at endpoints
The keyframe's value is then blended toward frame 0's value:
output_quaternion = slerp(original, frame0, sa)
output_position   = lerp(original,  frame0, sa)
output_scale      = lerp(original,  frame0, sa)
At the start of the window (alpha = 0), the keyframe is untouched. At the end (alpha = 1), the keyframe is exactly frame 0's value. In between, smoothstep gives the eased curve that has zero velocity at both endpoints — the mathematically smoothest one-frame interpolation.
Plus, after the loop, Loop Fixer always pins a keyframe at exactly t = duration with frame 0's value. This guarantees the loop closure is mathematically tight regardless of where the last existing keyframe lands.
In Snap mode, the math is trivial: skip the smoothstep loop entirely, just write/replace the keyframe at t = duration with frame 0's value.
Edge cases
Clips with only one keyframe
If a track has only a keyframe at t = 0 (a static pose), Snap and Blend behave identically: append a keyframe at t = duration with the same value. Result looks like a static pose for the full duration. No-op visually, but the loop is mathematically valid.
Clips with no keyframe at t = 0
Loop Fixer reads the first keyframe's value as "frame 0's value" regardless of its time. So if the first keyframe is at t = 0.5, Loop Fixer treats that as the loop target. This matches what the mixer does (it extrapolates the first value backward for t < first_time).
Frame 0 already equals frame N
The fix is a no-op visually, but Loop Fixer still pins the closure keyframe at t = duration — making the math airtight even if there's no observable change.
Mirror + Loop Fixer in the same session
Apply Mirror first, then Loop Fixer. Mirror modifies the per-frame poses; Loop Fixer ensures the modified end matches the modified start. Done in the other order, you'd close a loop on the original animation and then mirror the closed loop — typically not what you want.
Related
- Mirror Animation — the other Polish-menu tool, also clipData-based with live preview
- Quality Score — measures loop continuity as one of its sub-metrics
- What's New — Kinetiq 1.0 launch overview